
Upgrade your subscription for additional Features
| profile features | PREMIUM Subscription | PROSubscription |
|---|---|---|
| Profile Approvall | Fast - 48 Hours | 24 Hours |
| Targeted Location | 3 Locations/3 Countries | 10 Locations/10 Countries |
| Pro Badge |  |
pro |
| Company Logo | |
 |
SuperHost Badge  |
|
|
| Featured Profile | Show Above FREE Account | Above Free & Premium |
| Contact Owner | 5 Contact/Per 24h | 10 Contact/Per 24h |
| Add Custom Service | |
|
| Google Map On Profile | |
|
| $49/PER YEAR | $149/PER YEAR |
How to Register as an Airbnb Property Manager In this step by step guide, I will show you how to create a property manager account on CohostMarket.com and how to get the most out of your profile.
To start, click on Become A Member in the top right-hand corner of the home page, then select Register As Manager.
Next, you have the option to sign up using Facebook, Google or Email. To sign up using Facebook or Google (Gmail), click your desired option and sign in using your email and password. You will then be redirected back to CohostMarket where you can begin to create your profile.
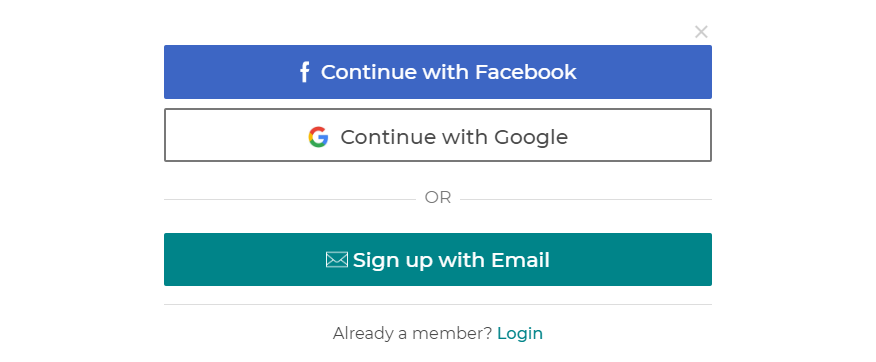
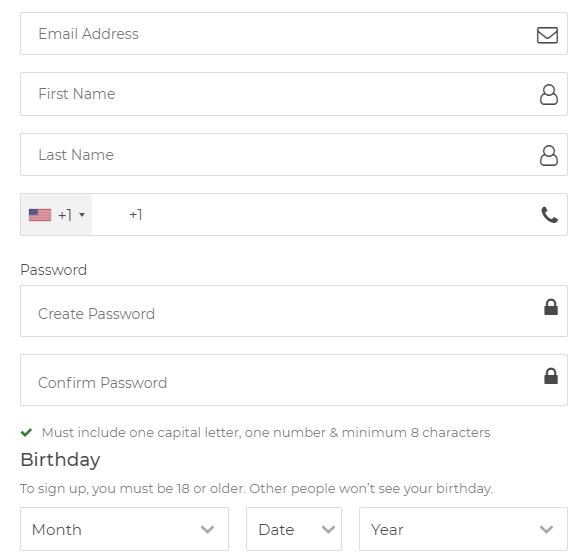
To sign up using email, enter your email address, first and last name, your phone number and birth date. Then choose a password that contains at least one number and one capital letter, with a minimum of 8 characters.
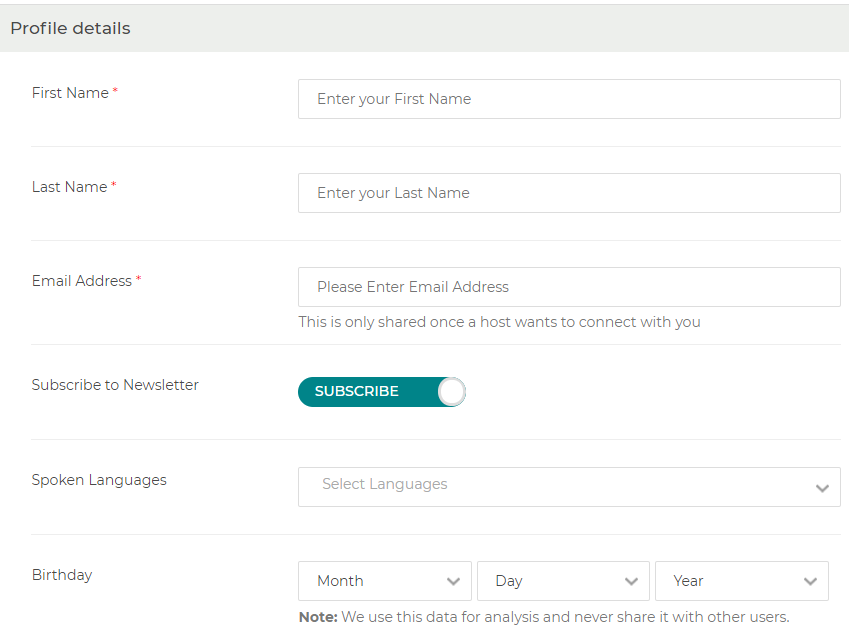
The first step to becoming an Airbnb Property Manager is to fill in all your details including your first and last name, your email address, your spoken language/s and your birthday.
Don’t forget to subscribe to the newsletter for important news and updates on the platform, as well as special offers and guides to help you become a better Airbnb property manager.
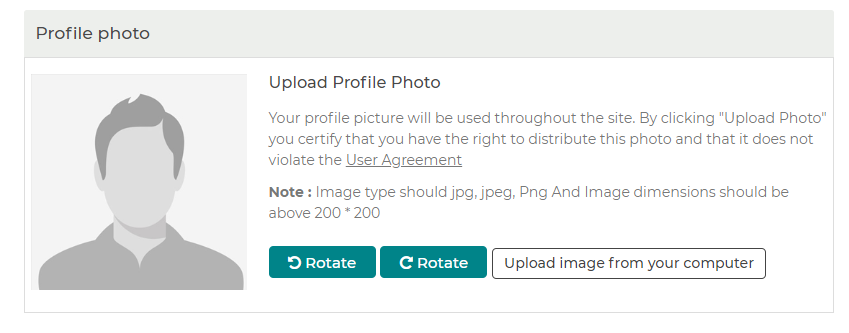
When choosing a profile photo, make sure to select a photo of yourself. It needs to be clear and larger than 200 x 200. This is the image that will represent you as a co-host, so try to find a photo that best represents who you are.
Once completed, click Save.
You have the option of three membership plans: Free, Premium and Pro. Select the option that fits your needs and then click Save Subscription.
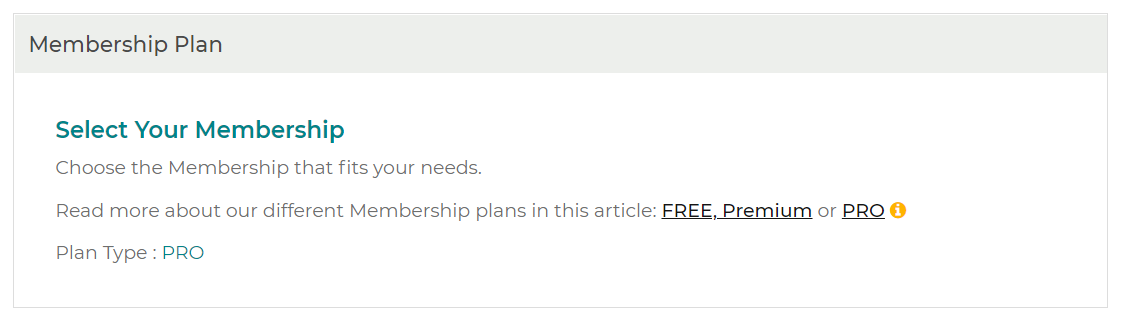
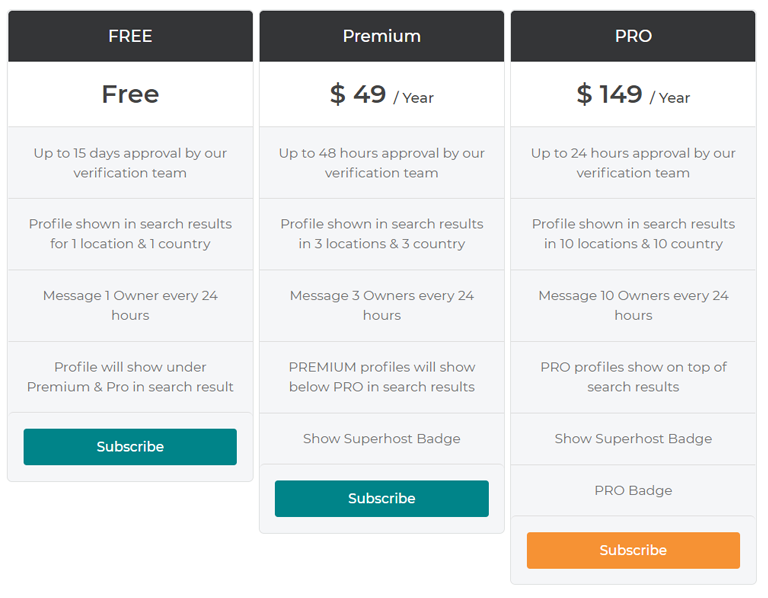
For more information about the different available plans, please see the chart above above or read our detailed information guide.
This section is an important step when setting up your Co-Host profile and will give you the opportunity to market your services to homeowners.
You can specify what type of Airbnb you would like to manage, how long you have been a manager and whether or not you are a company. In the description section, let homeowners know why they should hire you and what you have to offer.
Once you are done here, click Save and move on.
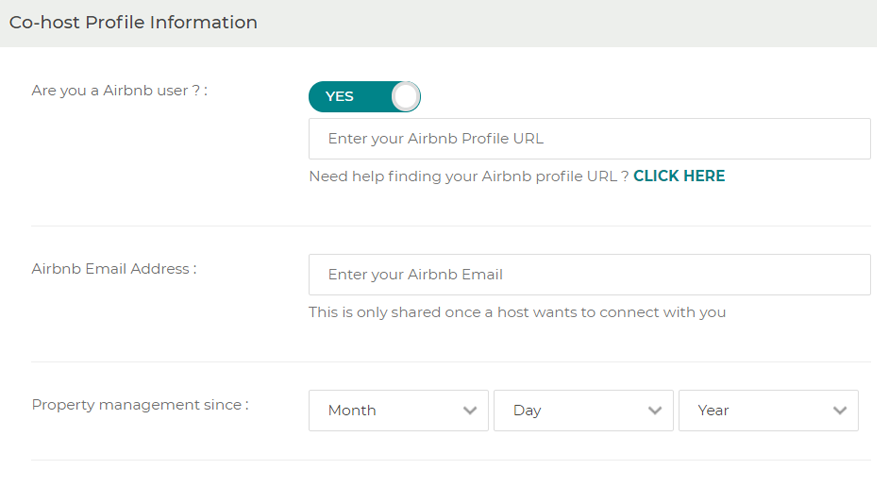
Having an Airbnb account or a company is not mandatory when becoming a property manager on CoHostMarket. But we do recommend you signing up to Airbnb. That way, homeowners can add you as a co-host on the Airbnb platform.
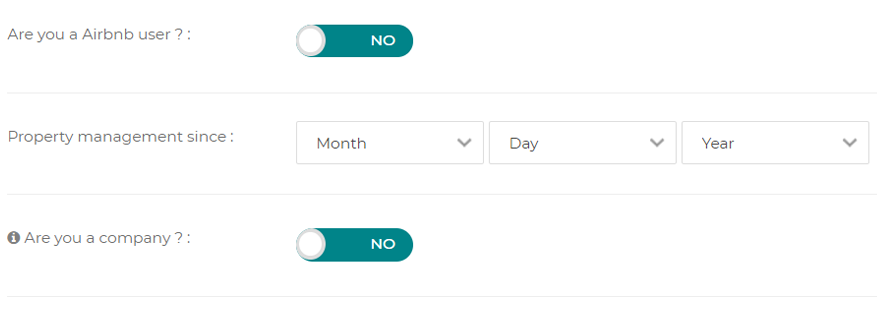
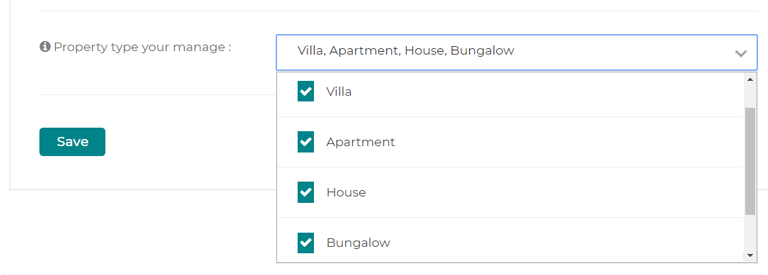
Under property type, select which type of property you would like to manage. If you would only like to manage houses and apartments, select only those options. If you are open to managing all types of properties select all types.
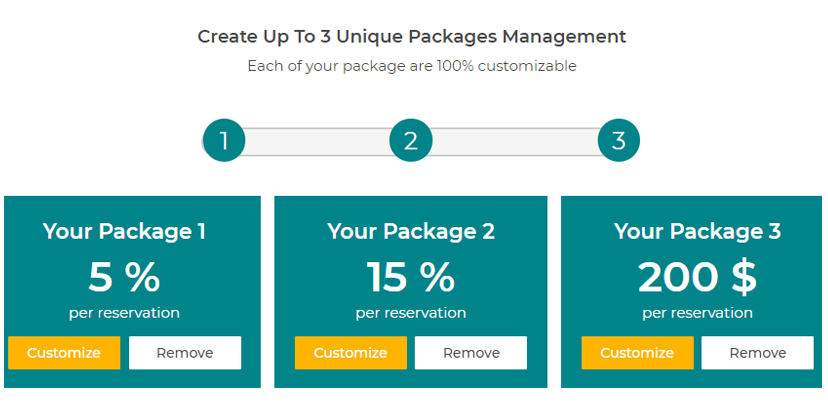
In this section, you can create up to three customized packages with the services you want to provide.
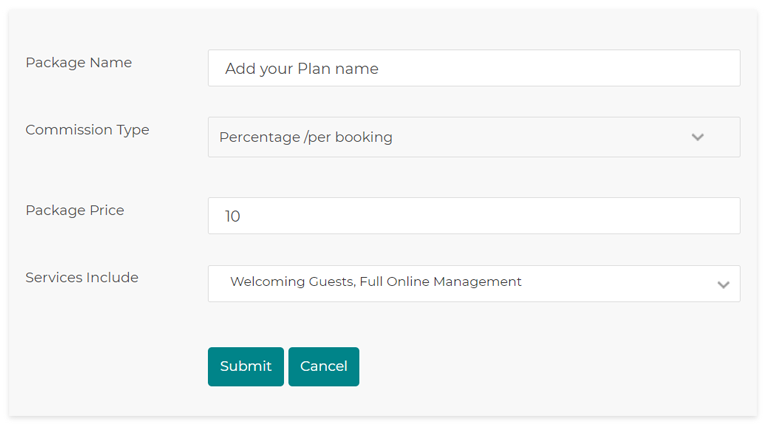
To begin, select customize on the Basic package and fill in the required fields including the Package’s Name. You will also have the option to add your service fees. You can charge a flat rate or percentage per booking. Find this options under the Commission Type tab.
Now its time to add the services you provide in each package by choosing from the drop-down menu. When you are done, click submit and then repeat these steps to create the other two packages varying your prices and services.
To customize your own package, select a package name and commission type, either a flat rate fee or a percentage per booking fee. Then set a package price or percentage price and include what services you would like to offer.
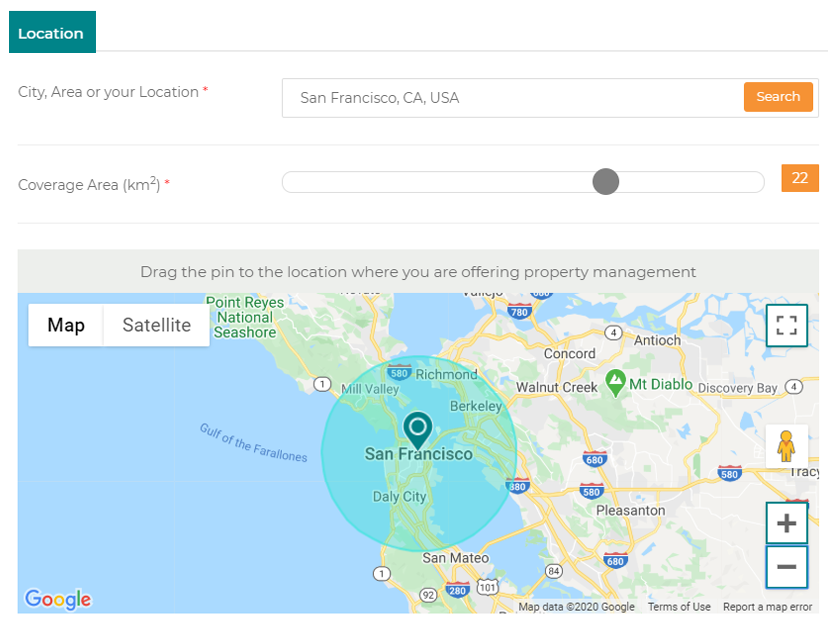
To show up in the search results you need to set your location and coverage area. To do this, simply type in your city, area or location where you are based.
Then, enter the coverage area so homeowners can find your profile and connect with you. The coverage area starts from 5 to 30 km2 and acts as a guide to show how far you are willing to travel.
Depending on your subscription type, you can add as many as 10 locations with a PRO account, 3 locations with a PREMIUM account and 1 location with a FREE account.
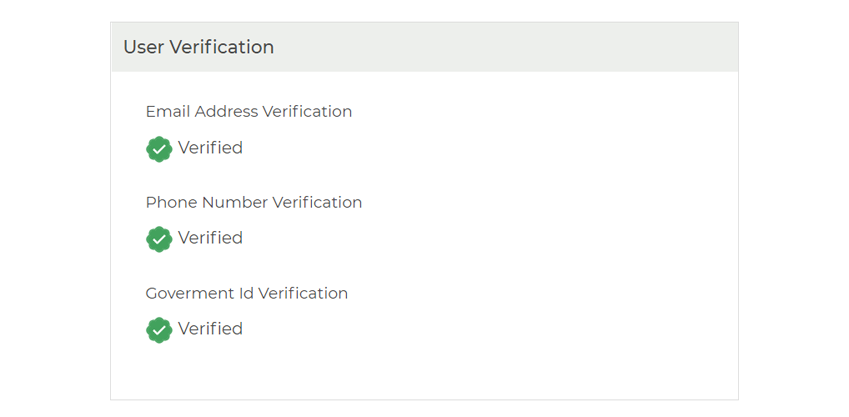
The trust and verification step involves verifying your email address, phone number and Photo ID. While it is not mandatory to verify your account, we highly recommend verifying at least one of these options, as fully verified users have more chances of being hired by homeowners either locally or remotely.
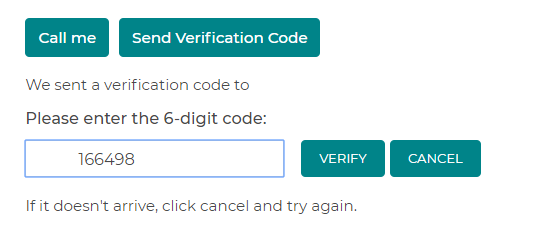
To verify your phone number simply enter your country and your number and click Send Verification Code. If your phone does not support SMS, you can receive your verification code via a phone call.

Having your phone number verified adds an extra layer of security and can help to recover a lost account. Your phone number is always kept private and is only shared with a homeowner once you have a confirmed match.
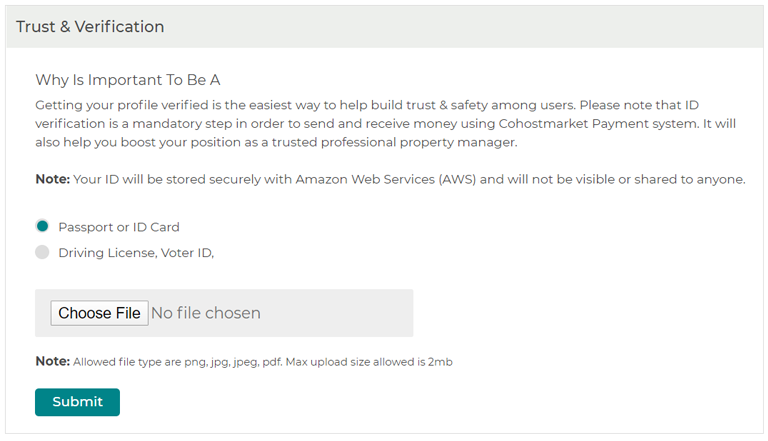
The next step is to verify your photo ID. This is a mandatory verification step that helps to build trust within the community. This will also boost your position as a trusted professional property manager.
To verify your photo ID, all you need to do is upload a photo of your passport or ID card. This will then be verified by a member of our team and will not be visible or shared with anyone. Once you are done, click Submit and your profile will be complete. Time to start co-hosting!
Once you have verified your email address, phone number and government ID, you account will look like this:
Don't have an account? Sign Up

.svg)

 Continue with Facebook
 Continue with Google