
Upgrade your subscription for additional Features
| profile features | PREMIUM Subscription | PROSubscription |
|---|---|---|
| Profile Approvall | Fast - 48 Hours | 24 Hours |
| Targeted Location | 3 Locations/3 Countries | 10 Locations/10 Countries |
| Pro Badge |  |
pro |
| Company Logo | |
 |
SuperHost Badge  |
|
|
| Featured Profile | Show Above FREE Account | Above Free & Premium |
| Contact Owner | 5 Contact/Per 24h | 10 Contact/Per 24h |
| Add Custom Service | |
|
| Google Map On Profile | |
|
| $49/PER YEAR | $149/PER YEAR |
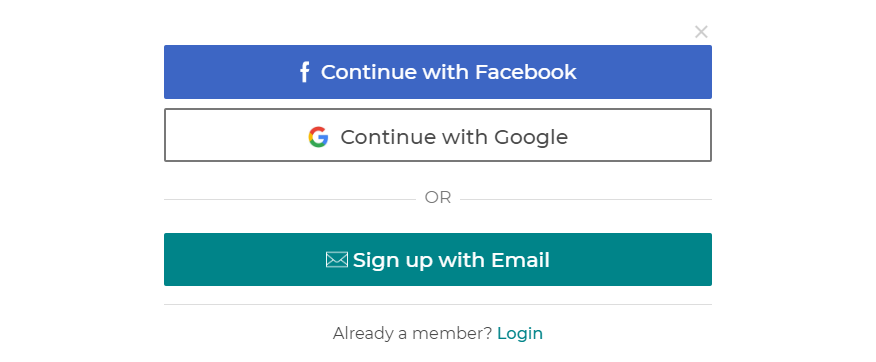
To start, click on Become A Member in the top right-hand corner of the home page, Homeowner Account on CoHostMarket then select Register as Property Owner.
Next, you have the option to sign up using Facebook, Google or Email.
The first step to creating your homeowner account is to fill in all your details including your first and last name, your email address, your spoken language/s and your birthday.
Don’t forget to subscribe to our newsletter for important news and updates about the platform and special offers and guides to help you with your property/s.
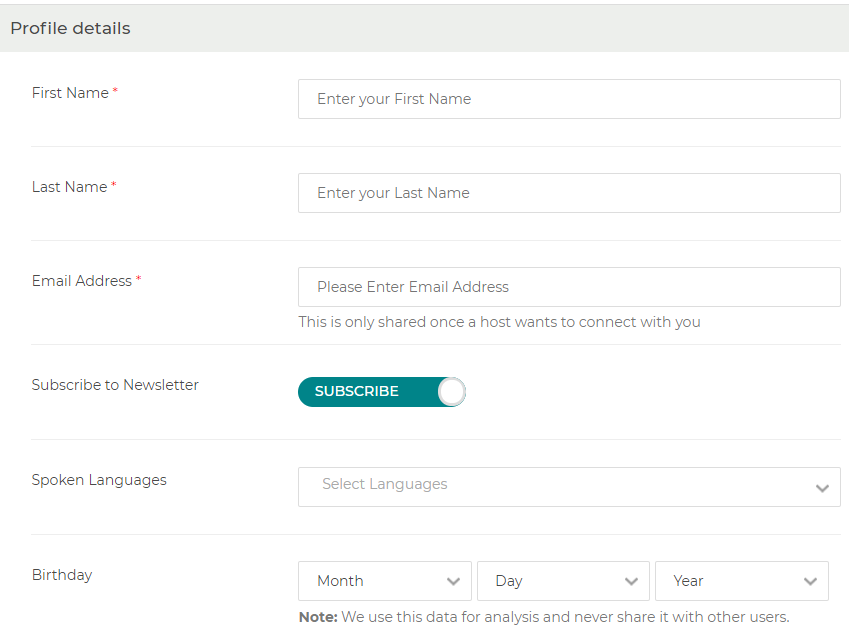
When choosing a profile photo, make sure to select a photo of yourself that is clear and larger than 200 x 200.
This is the image that will represent you as a homeowner, so try to find a photo that represents you and who you are.
Once completed, click Save.

Competing your owner’s profile will help you to stand out and will help property managers find out more about you and what services you are looking for.
For Homeowner Account on CoHostMarket your first step is to add your Airbnb profile URL. To do this, follow this guideline:
Step 1) Login to your Airbnb account
Step 2) Click on your profile image. It is a circle on the upper-right corner of the website
Step 3) Click on Profile
Step 4) The profile URL will show in the address bar of your browser. Just copy the URL and paste it into the field
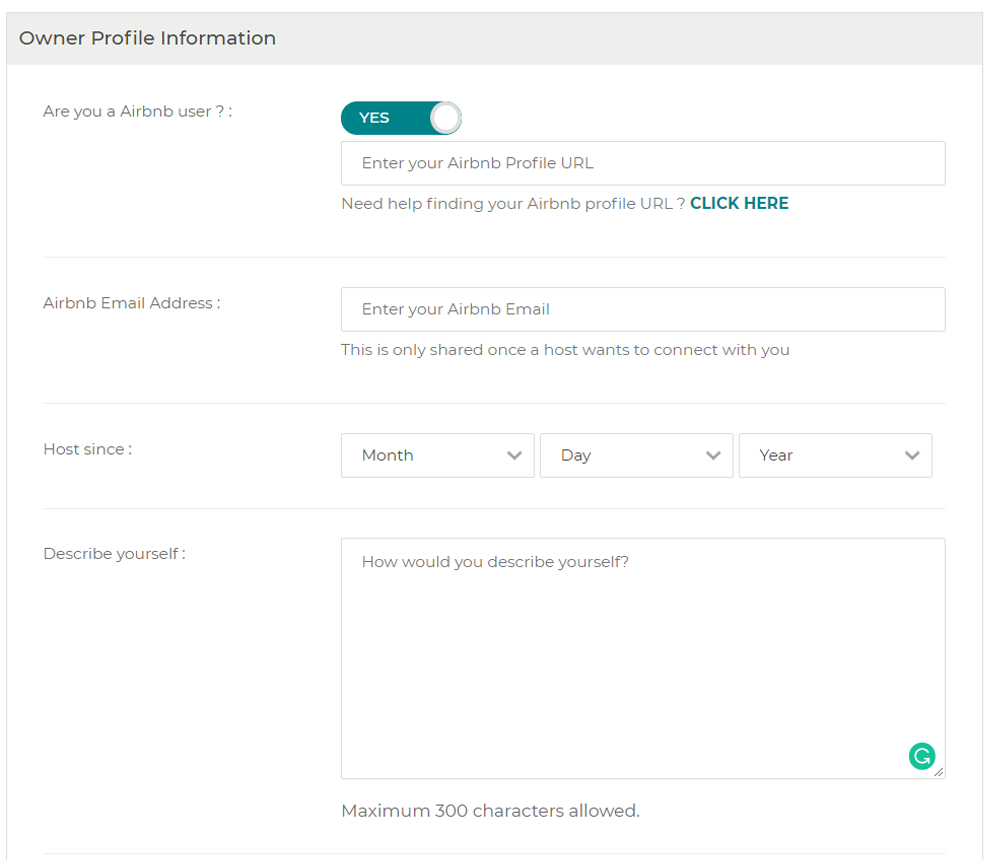
Continue to fill in the rest of the profile including your Airbnb email address (the email you used to sign up for Airbnb) and how long you have been a host for.
Then, let potential co-hosts know a little more about you. What is your Airbnb’s experience and what you are looking for in a Property Manager, and if you work full time or part-time? This will help you connect with the perfect co-host.
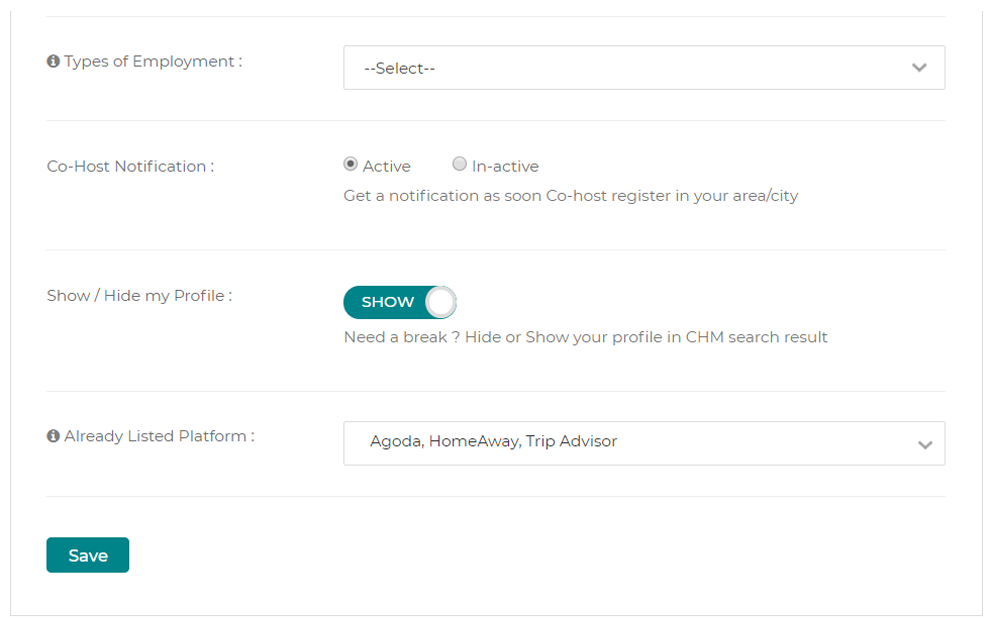
Next, you will have an option to show or hide your profile, if you are actively looking for a co-host then click show. If you aren’t ready yet, change this to hide.
Lastly, select which platforms you currently have your property listed on and then click Save.
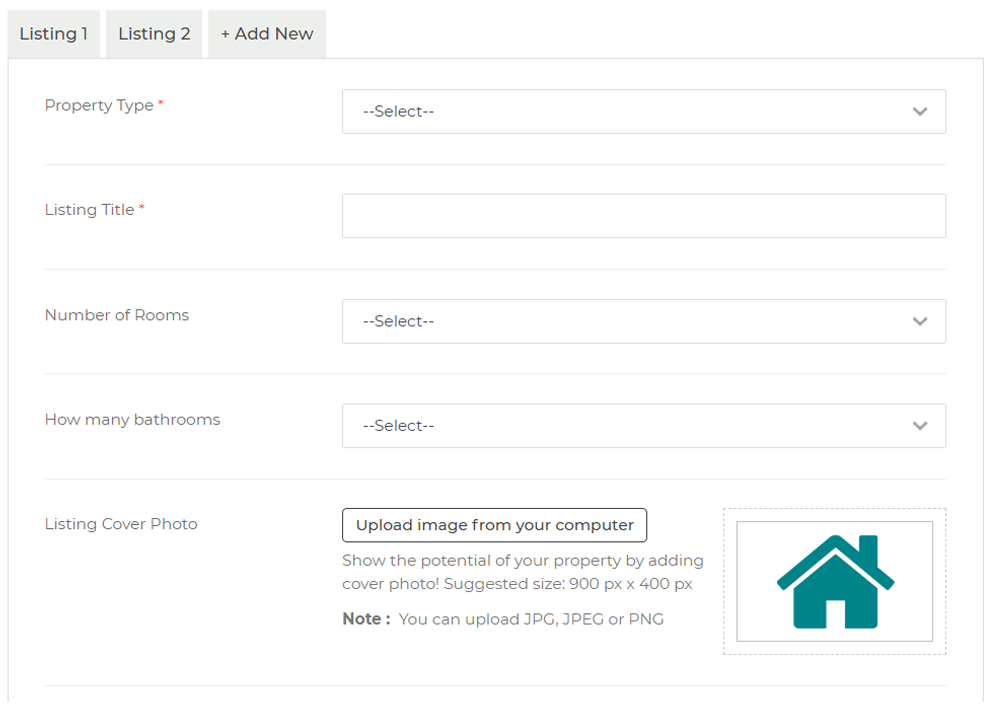
The next step is to let property managers know all the information about the property/s that you need help with.
Details such as type of property, how many rooms or bathrooms there are and what services you need, will help to pair you with the perfect co-host.
Make sure you fill out each field and then click save.
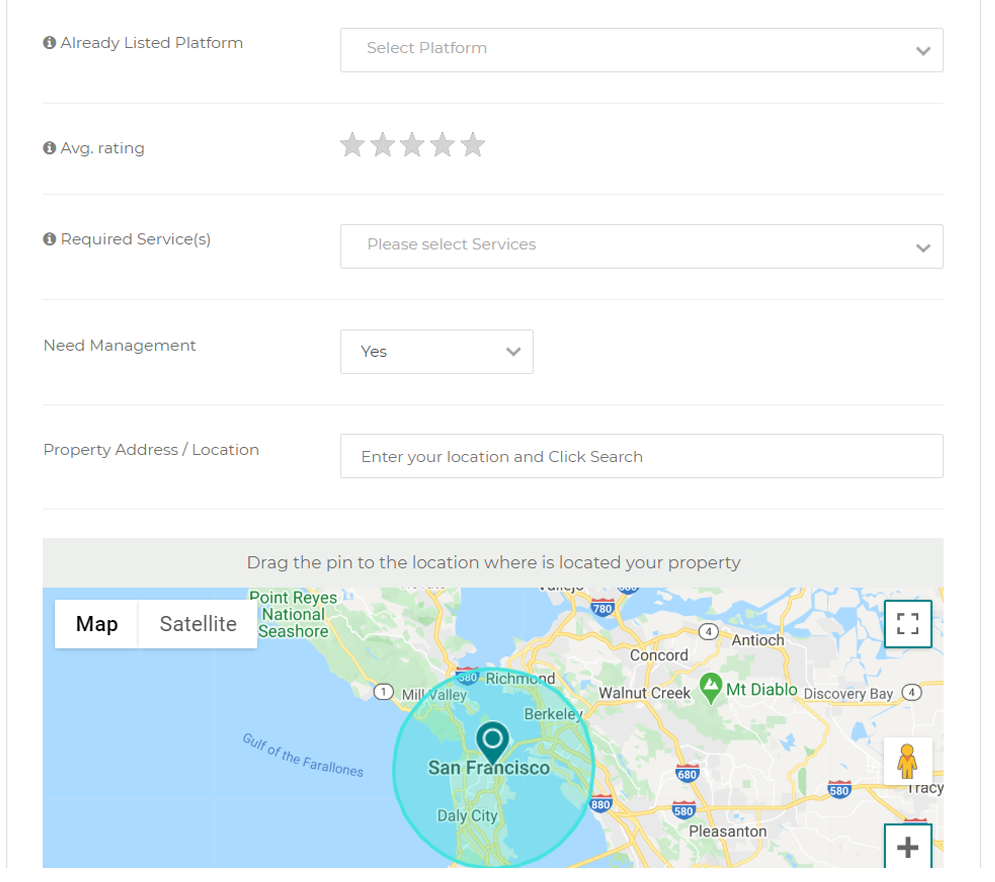
In order to show up in the search results you need to set your location and coverage area. To do this simply enter in your city, area or location where your property is located.
Then, enter in the coverage area so potential co-hosts can find your profile and connect with you.
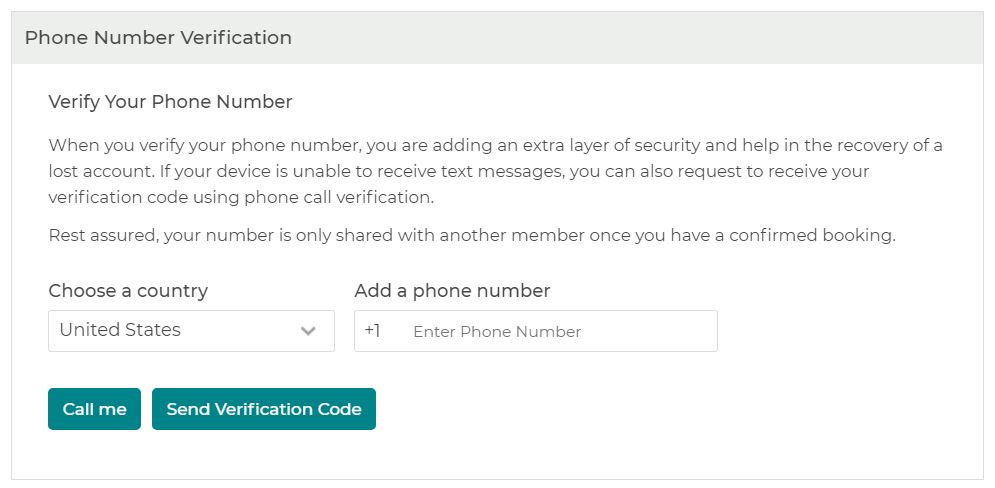
The Trust and Verification process involves verifying your email address, phone number and Photo ID.
To verify your phone number, simply enter your country and your number and click Send Verification Code. If your phone does not support SMS, you can receive your verification code via a phone call.
Having your phone number verified adds an extra layer of security and can help you recover a lost account. Your phone number is always kept private and is only shared with a property manager once you have a confirmed match.
For Homeowner Account on CoHostMarket the next step is to verify your photo ID. This is a mandatory verification step that helps building trust within the community. It will also boost your position as a trusted home owner.
To verify your photo ID, all you need to do is upload a photo of your passport or ID card. It will be verified by a member of our team and will not be visible or shared with anyone.
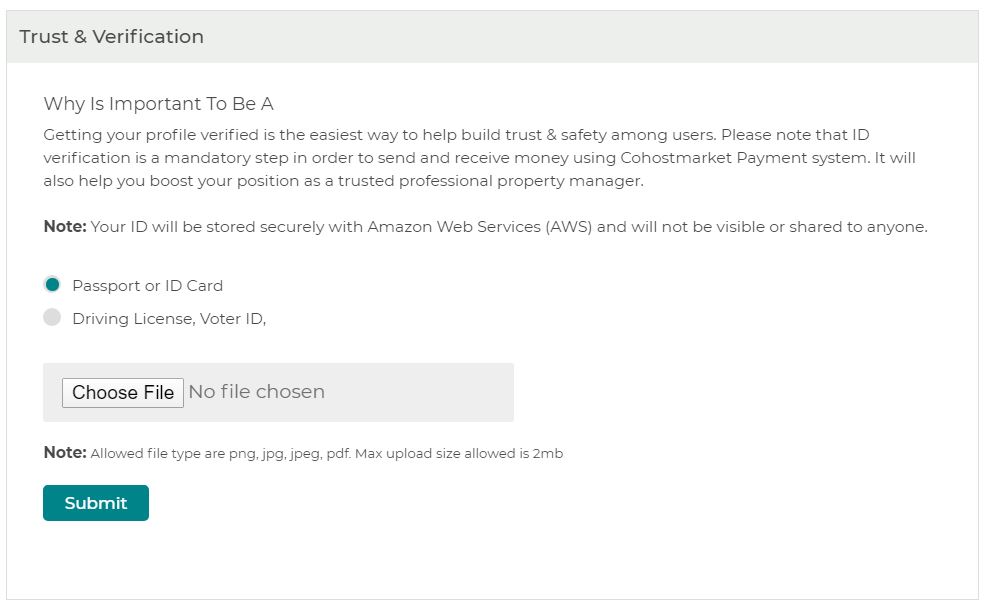
Once you are done, click Submit. Congratulations, you are now ready to start connecting with co-hosts!
Don't have an account? Sign Up


.svg)

 Continue with Facebook
 Continue with Google